Schedule a Folder
Introduction
Web users can schedule folders to mobile users, and mobile users can access those folders from anywhere! A folder can be scheduled from the web to one user, or to an entire team, depending on how your department works.
Mobile users will only see folders scheduled specifically to them for the date range you select plus the range you set up in the Mobile Schedule Window.
Scheduling from the web isn't the only way to schedule folders. Mobile users can schedule new folders or edit their existing schedule. Scheduling will go a long way to keeping your mobile device organized.
Schedule a Folder
Mobile Instructions
All folders created in the mobile application will automatically be added to your schedule. When do you need to complete the folder? Who else on your team needs the folder added to their schedules? Your call!
- Tap
Foldersfrom the Main Menu. - Tap
+. - Fill in the New Folder details as desired:
- Folder ID: If you do not enter a specific ID, we will auto generate one for you.
- Folder Type: Required, Select the type of folder you'd like to create.
- Account: Required.
- Location
- Description
- Schedule Details: Select a start and end time to schedule your folder. You can also add a note for the person(s) you share the folder with.
- Share Folder With: Select people to share the folder with. The folder will display in their schedule as well as yours.
- Tap
Create Folder.

Web Instructions
To schedule an existing folder from the Calendar:
- Click the
Calendartab from the main menu. - Click the Down button on the existing folder and then select "Edit" from the drop down menu.
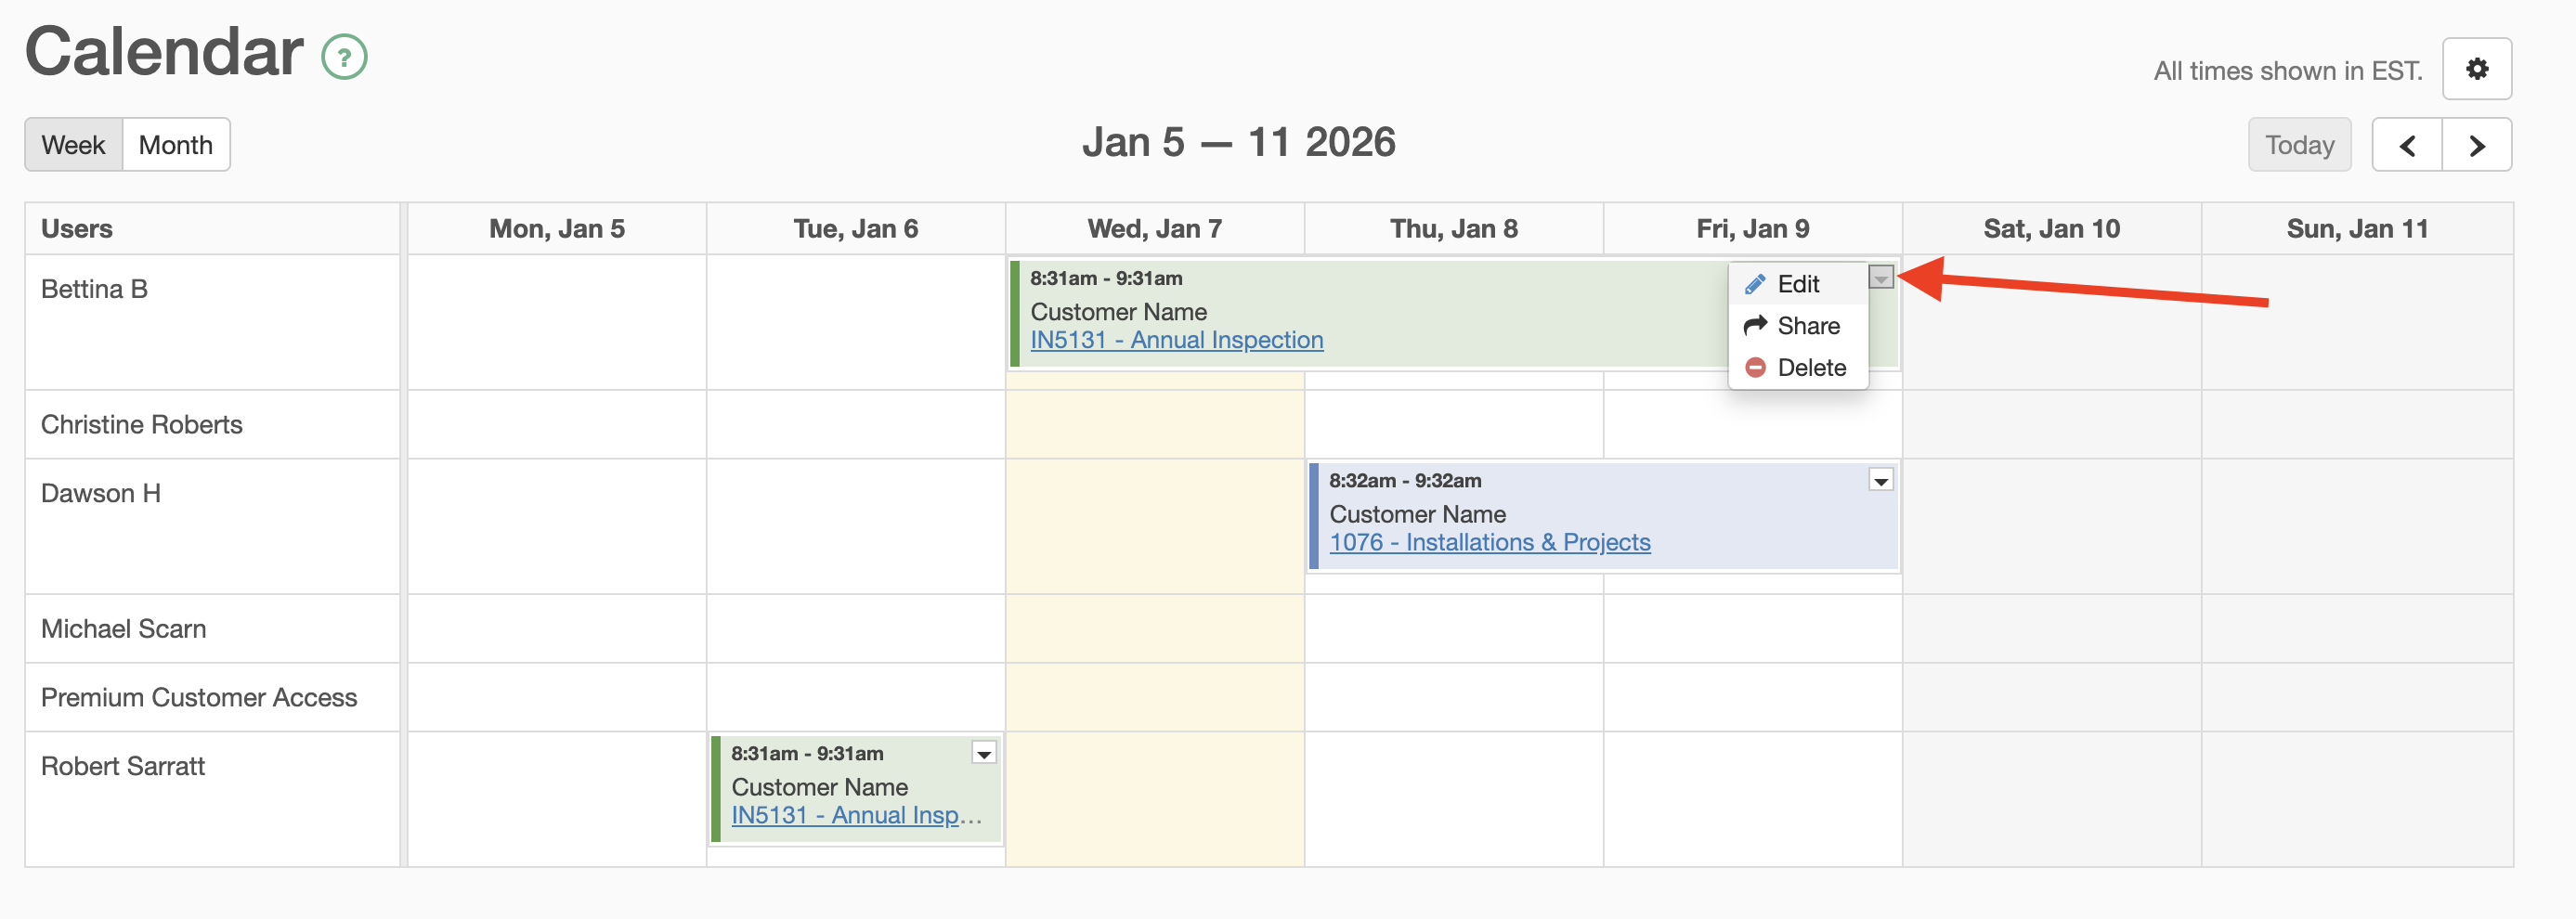
- In the next screen, you can make edits to the existing schedule for the folder.
- You can also drag the folder box on the calendar to a new date or user and/or expand the date range by clicking and dragging it.
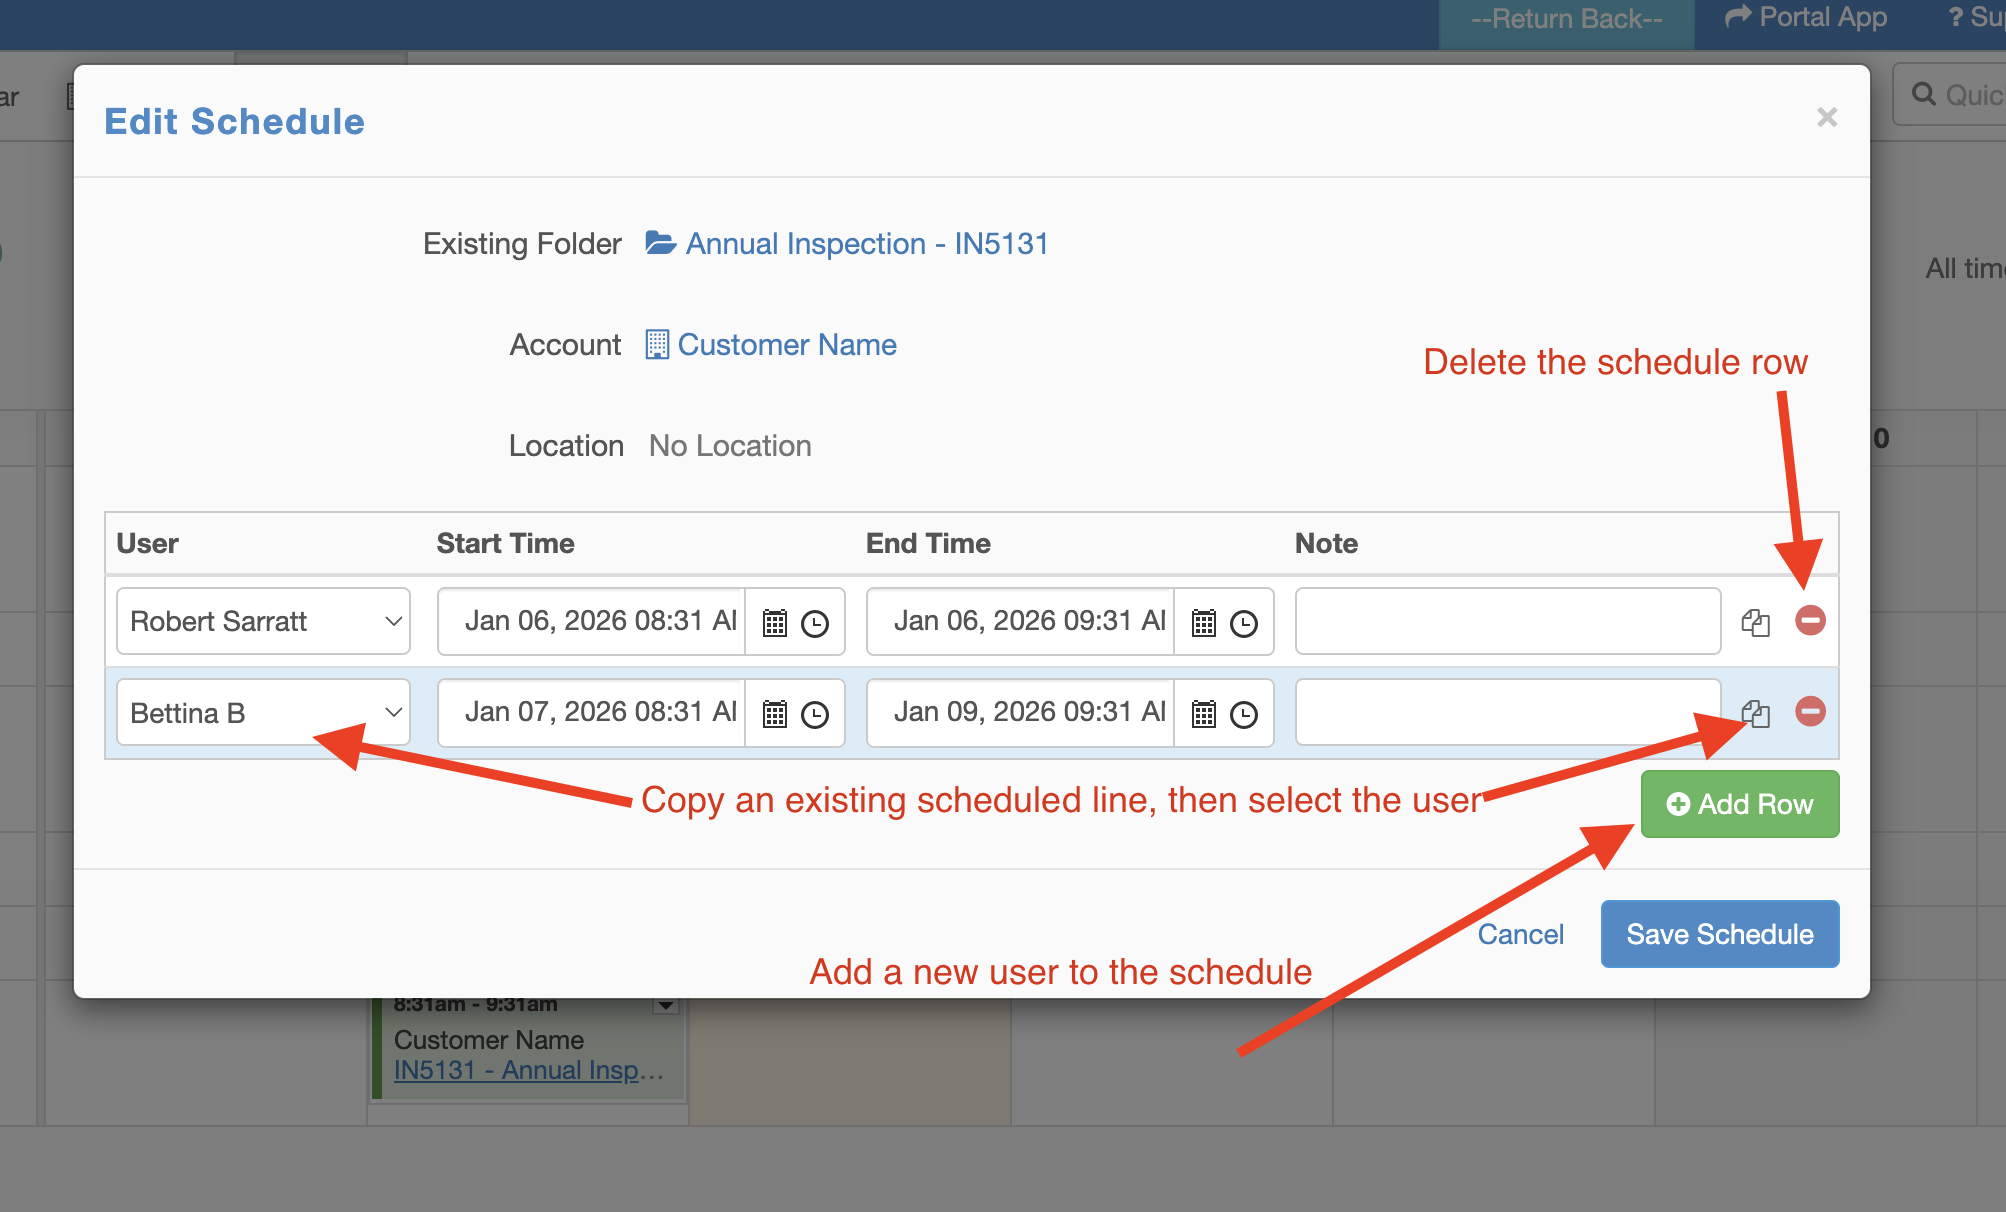
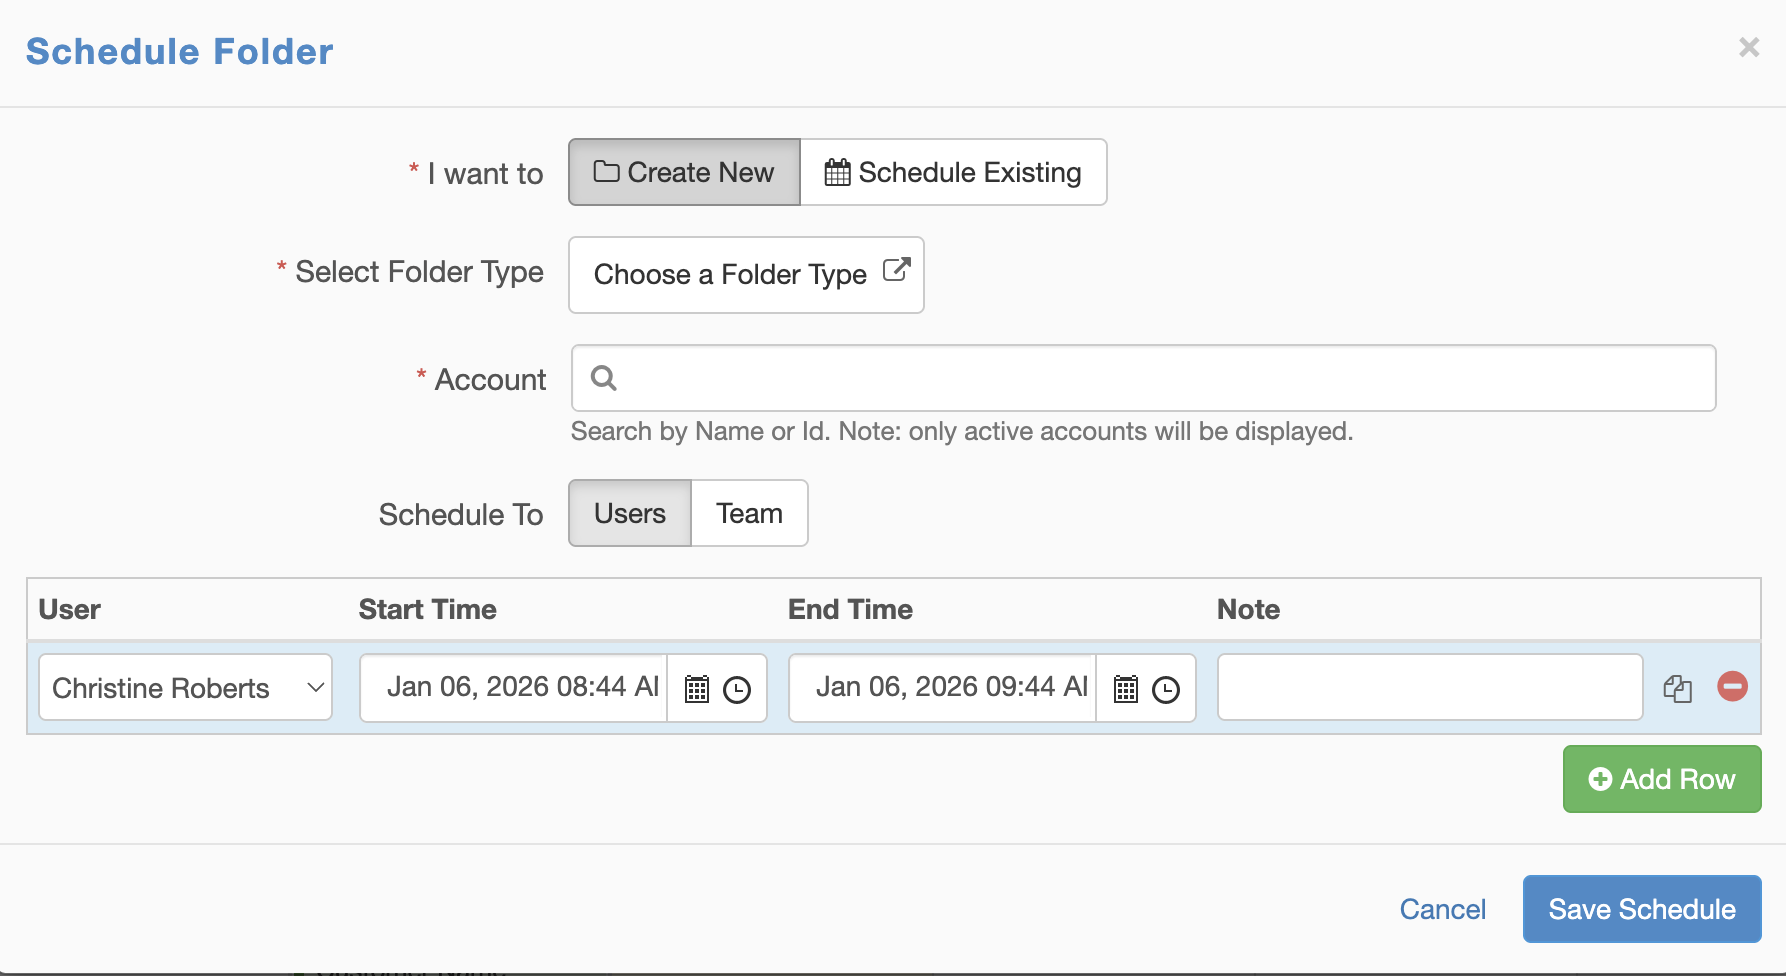
To schedule a new folder within the calendar:
- Click on the
Calendartab at the top from the main menu. - Click on any empty area on any day on the calendar within the row of the desired user.
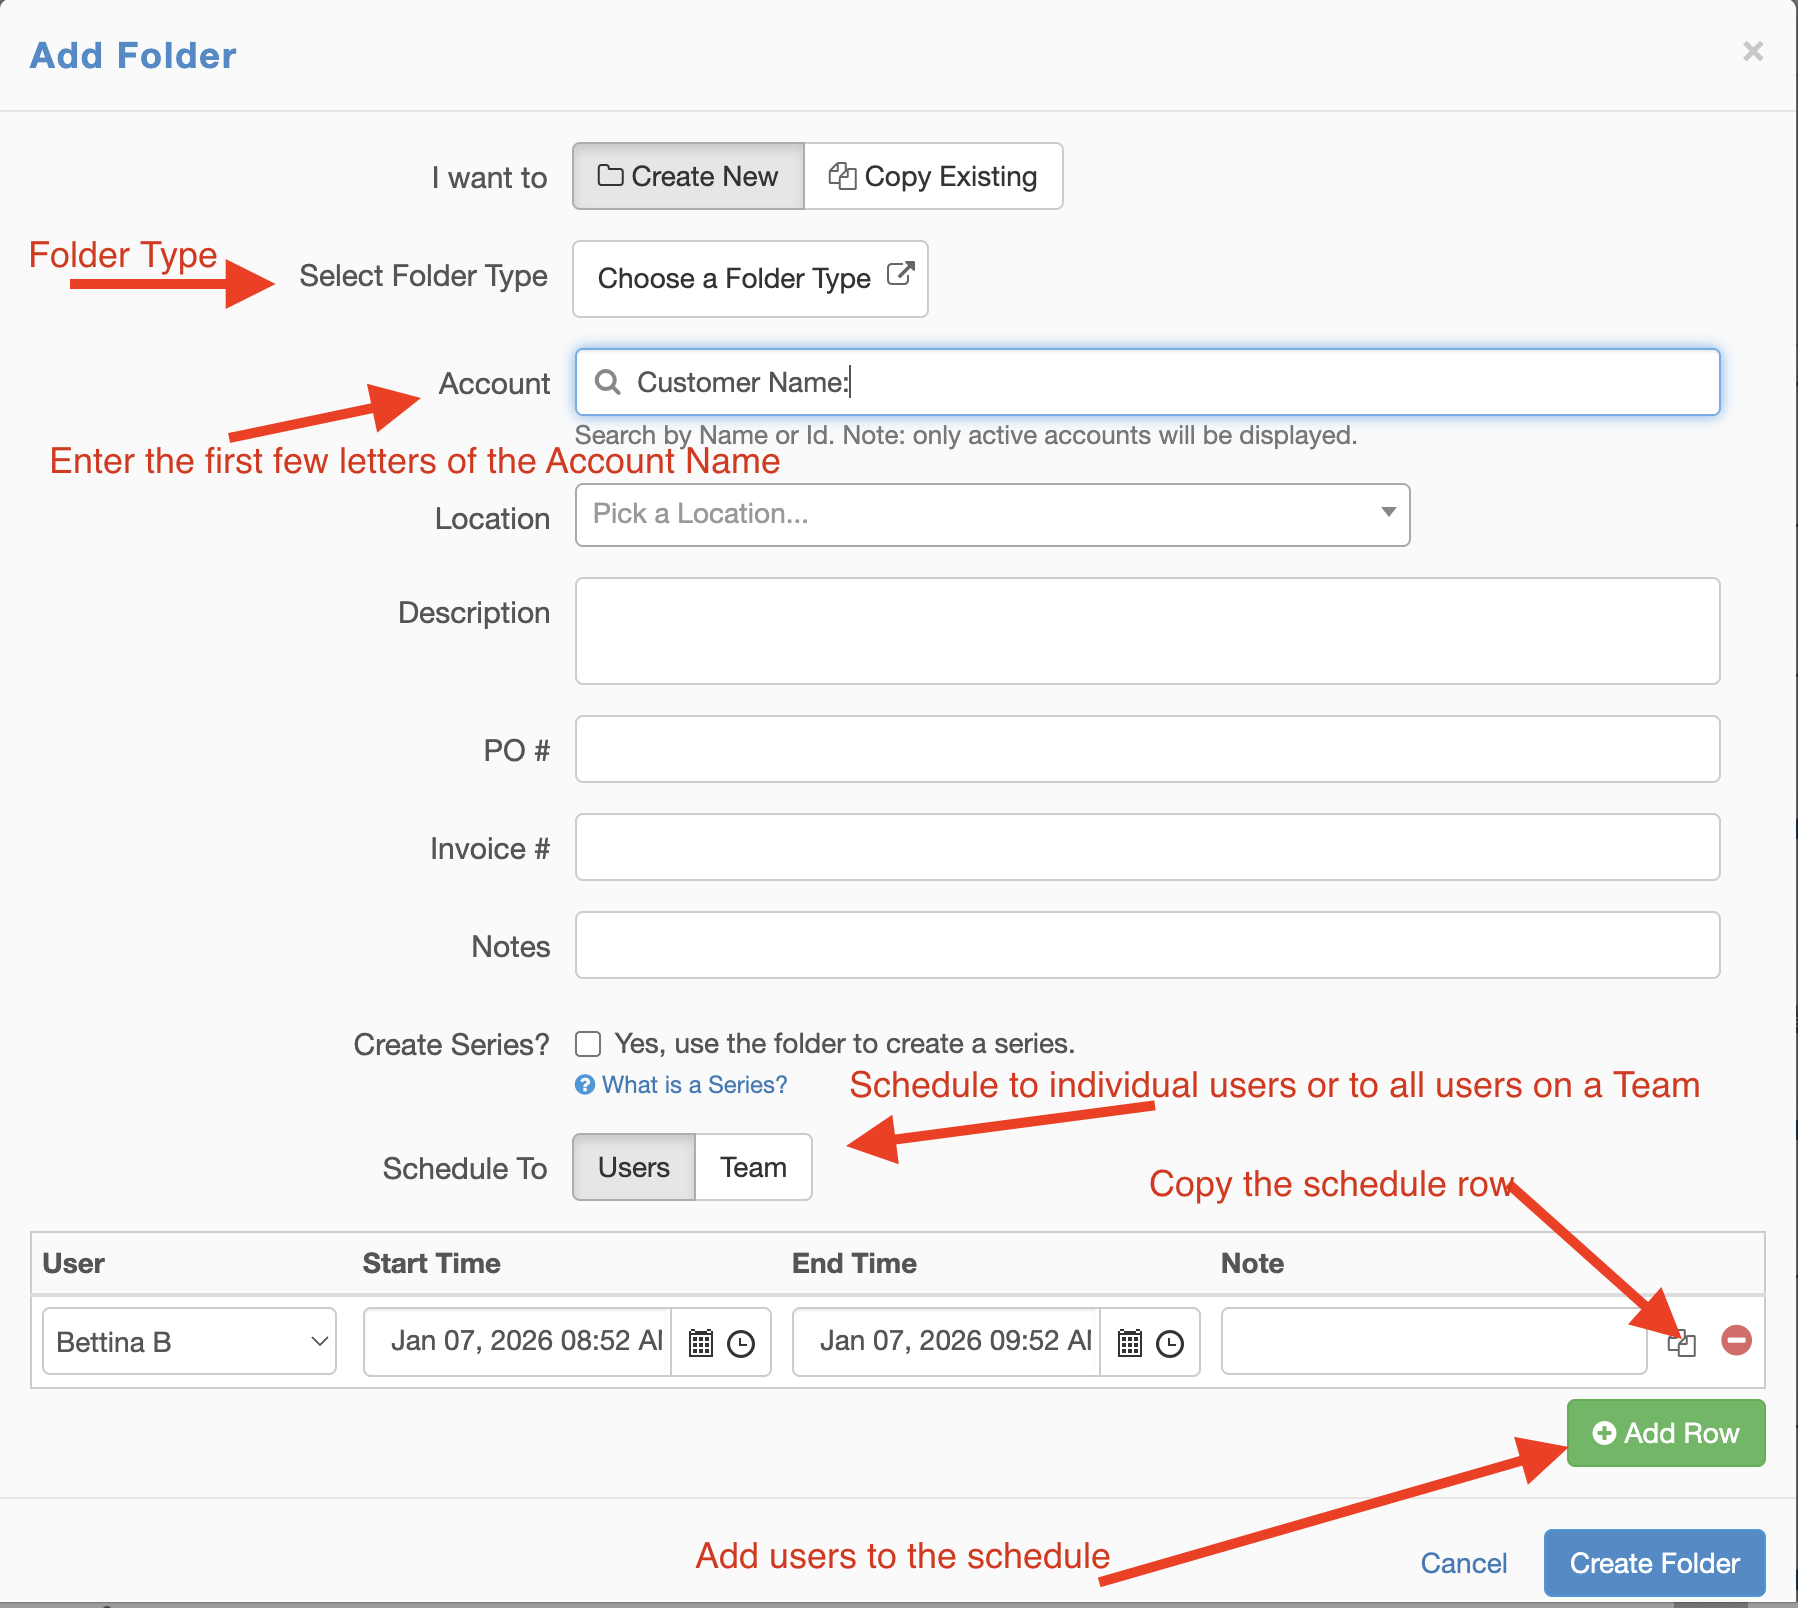
- To create a new folder, click on the
Create Newoption - Click
Choose a Folder Typeand select the type of folder you want to create. - Enter the first few letters or numbers of the account you want to create the folder in. Then select the appropriate account from the list that appears below.
- Add the schedules you want on the new folder by selecting the user, start time, end time and note (if needed). Click
Add Rowto add more users to the folder schedule. - Click
Save Schedule.

Schedule a Folder from the Folders Tab
1. Click Folders in the main menu.

2. Click Add Folder.

3. Choose Folder Type: Select the Folder Type for the new Folder. (What you are doing…inspection, service, etc). Then click “I’m Done”.
4. Account: In the next Field, “Account,” search for the Account you want to add the folder to. (Just start typing in the name of the account. If you haven’t created the account, you will want to do that before creating a folder). Here’s how to create an account: http://docs.inspectall.com/article/6-your-first-account
5. Series: Optionally create the folder as a series. (Use this option for recurring inspections that you want to schedule all at once).
6. Schedule: Select the users and the date range for the folder. The users that you schedule the folder to will automatically see the folder on their mobile app when they login or sync up. If you have more than one user to schedule the folder to, you can “Add Rows” or even copy an existing row and change the user name. You can also select "Team" to schedule the folder to an entire team of users. More details here
7. Click Create Folder.
Edit the Schedule within a Folder:
- Navigate to the individual folder from anywhere within the application.
- Click on the Schedule tab (with the calendar).

- Click
Addto add a schedule. - Hover over the existing schedule to see options to edit it or delete it from the folder.

- Fill in the schedule details as necessary.
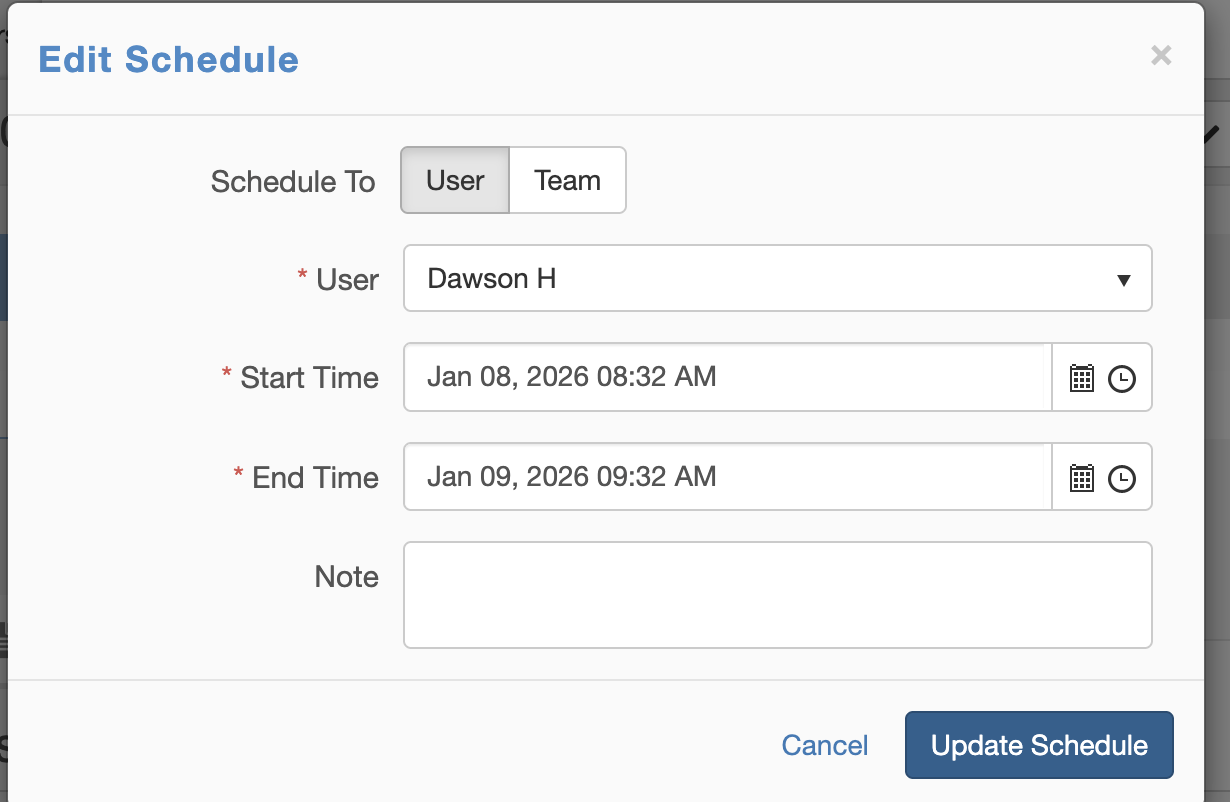
- Click
Create Scheduleafter all changes are made.