Organize with Categories and Classes
Introduction
As you begin to build form templates, you’ll want to keep them organized. The form builder structures your form templates into categories and classes. When you're finished, your setup may look something like what you see below.

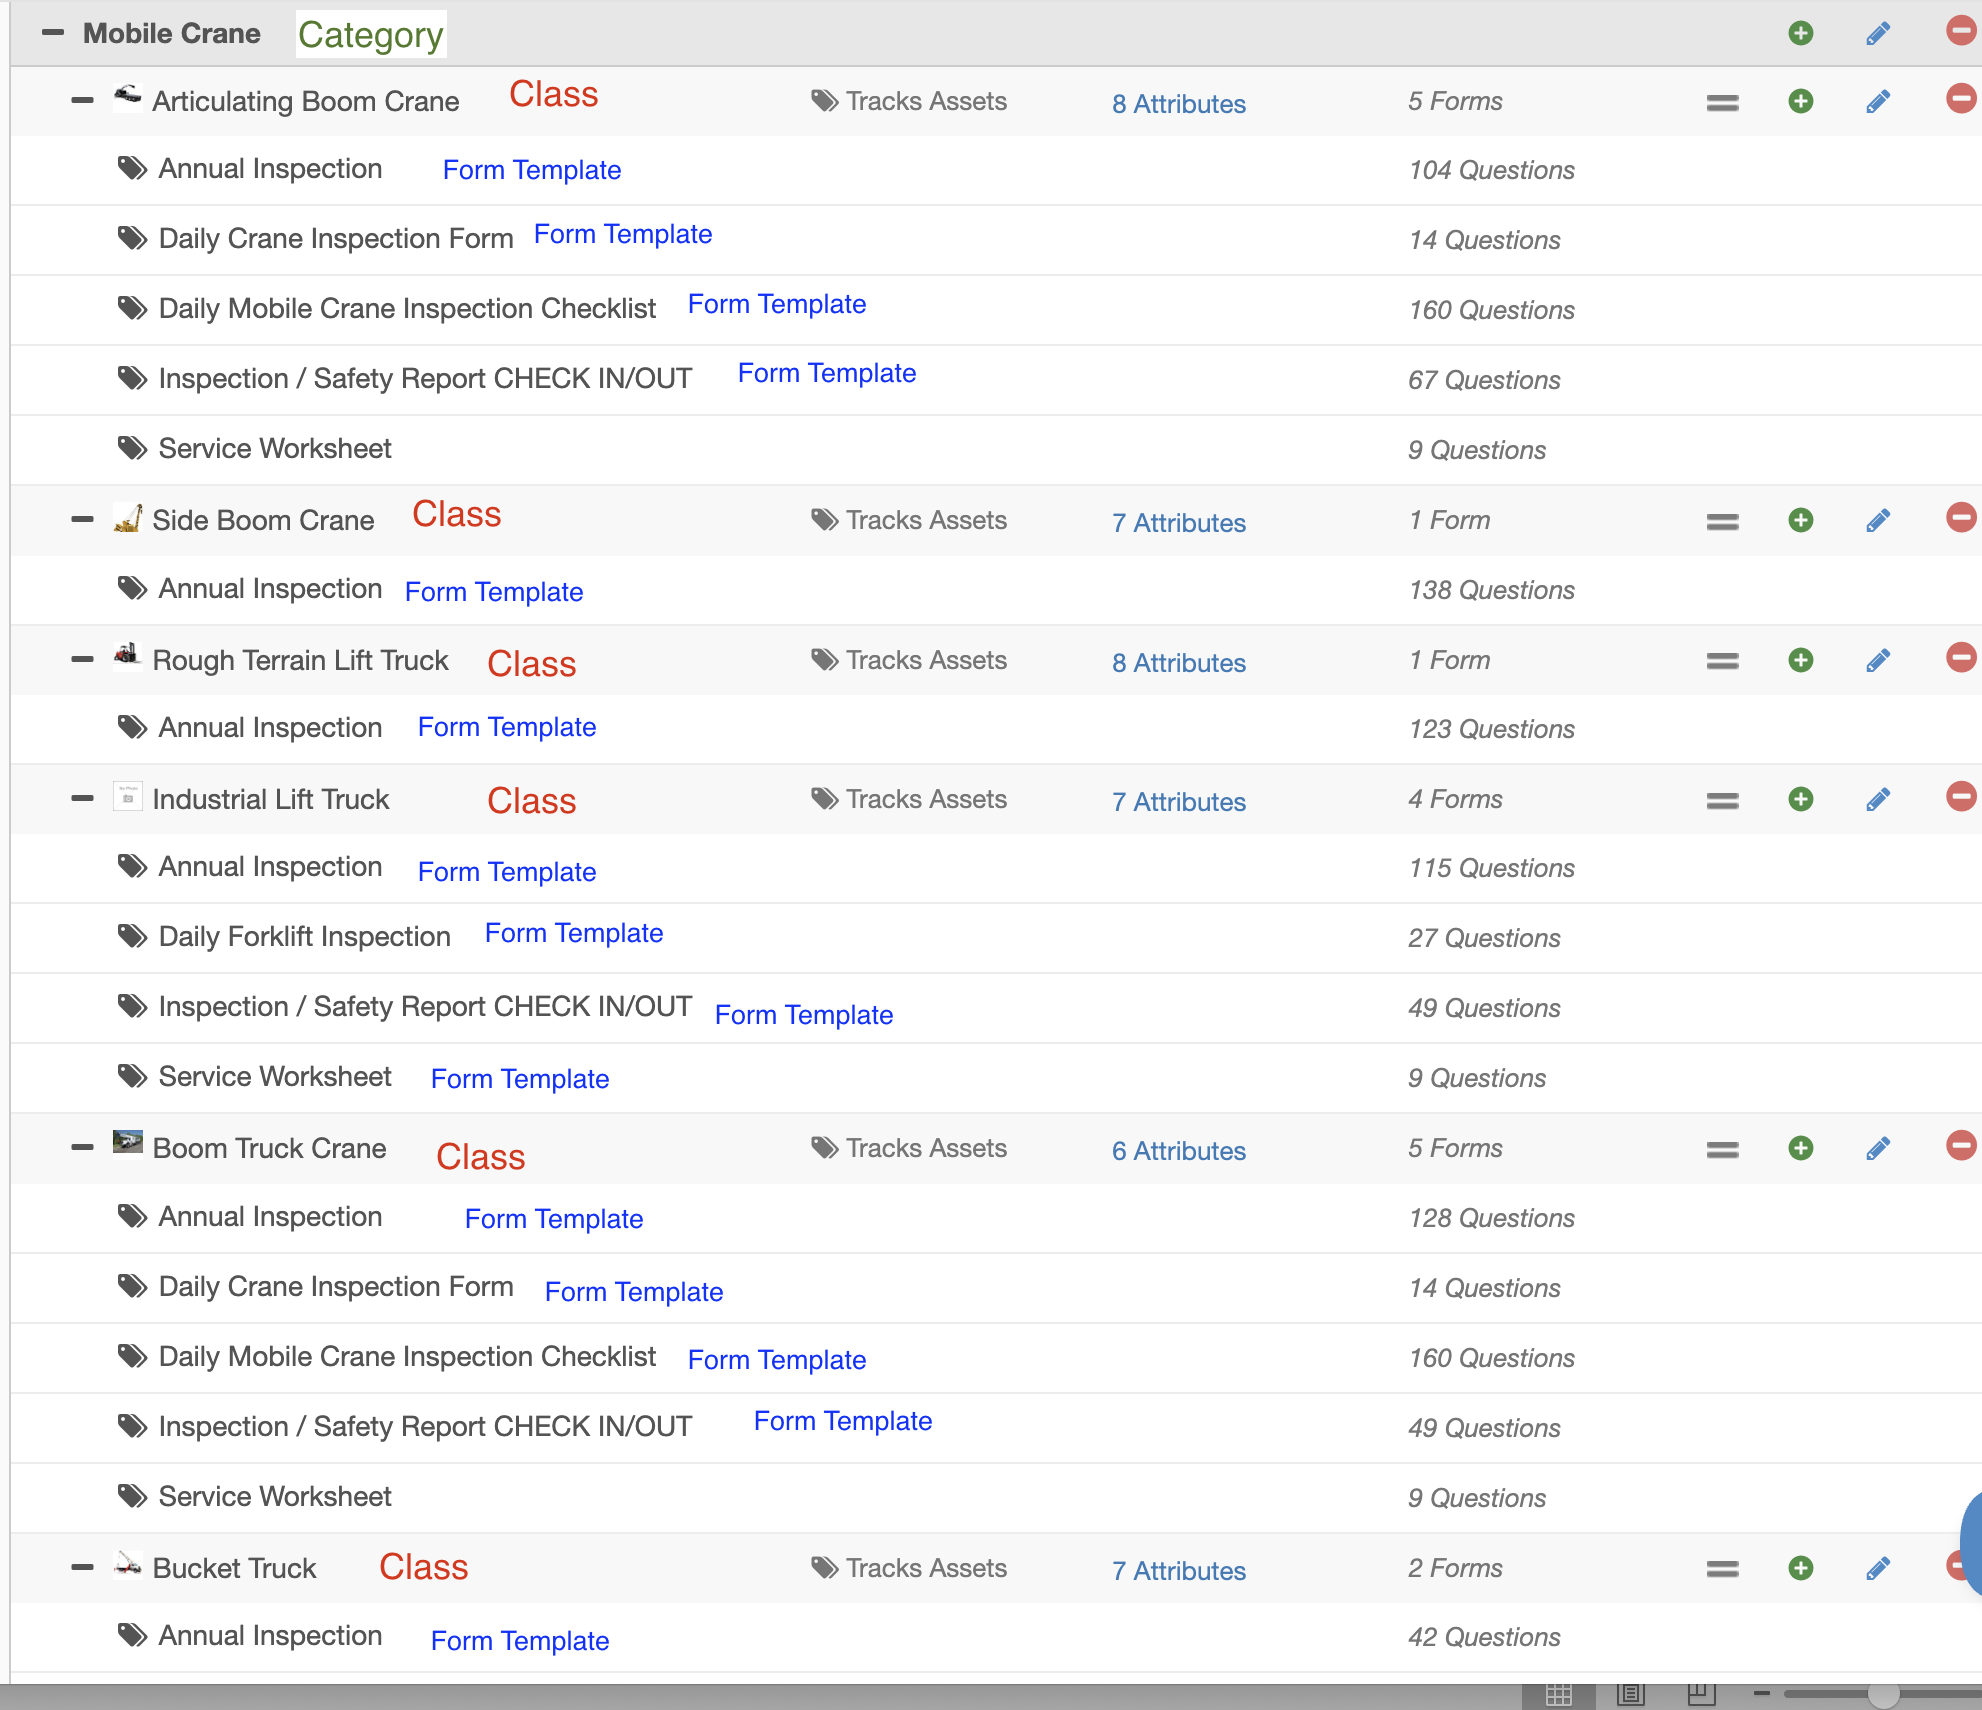
In the screen shot below, you will see what each row represents. In this example, the CATEGORY is "Mobile Crane". The category is the section that appears in the Gray Bars in Form builder.
Under the CATEGORY of "Mobile Crane" are multiple CLASSES. The CLASSES are Articulating Boom Crane, Side Boom Crane, Rough Terrain Lift Truck, Industrial Lift Truck, Boom Truck Crane, and Buckt Truck. Under each CLASS, you can have multiple form templates. Form templates can only be used for the asset class under which they are created. Attributes will be specific to a CLASS of asset
Categories
Categories are the highest level of organization when you're building form templates. Once you create a category, you’ll simply need to give it a Name. Remember that your Forms are going to be organized into classes and categories, so try to create an outline that's flexible but not overly deconstructed. There's no real magic to categories - you can have one or many. Categories are primarily built to help with navigating the application. Always try to have a category with multiple classes underneath it.
Here’s a few good examples of category names:
- Workplace Exposures & Protections
- Fire Protection & Prevention
- Safety
- Quality
- Ergonomics
- Buildings and Equipment
- Material Handling
Add a Category
- Click
(Your Name)>Form Builder. - Click
Category Options. - Click
Add Category. - Type the name of the new category.
- Click
Create Category.


Classes
Classes are the glue that holds your form templates together under categories. Classes fit between the category and form templates, and you can have one or many form templates in each class. You can improve the organization of your classes by adding an icon to the class that is a visual representation of the assets, forms, or process that class outlines.
Classes enable asset tracking which allows all of the relevant identifiers, attributes, question exclusions, and form templates for assets. You can also use classes to easily group form templates that don't track assets also.
Here’s a few good examples of class names:
Category: Workplace Exposures
- Machine Guarding
- Lock Out / Tag out - Energy Control
- Personal Protective Equipment
- Sanitation
Add a Class
- Click
(Your Name)>Form Builder. - Click
+beside the category you want to add the class to. - Type the name of the new class, upload an icon, and decide whether this class will
Track Assets. If it will, be sure to click the box beside that option. More details on asset tracking versus non-asset tracking HERE. - If you selected to
Track Assets, fill in the additional fields for ID1 Name, ID2 Name, Asset Status settings, and Urgent Note settings. Set up your ID1 and ID2 fields here (searchable fields within InspectAll that identify the asset). More on ID fields HERE - Click
Create Class.


After creating the Class, you can set up Attributes for the class. More details HERE.
And you are able to set up forms under the new class you created. More instructions HERE.