.png)
Folder Report Cover Page
- You can set up a different Cover Page for each of your Folder Types. This article details how to set up the cover sheet for each of the Folder Reports for the selected types. Read more about Folder Reports HERE.
- From the InspectAll website, click your name (at the top right of the page) and select "Folder Settings" from the drop down menu.
- Click the blue pencil icon beside the folder type you want to edit.
Report Options
The selections you choose in Report Options will dictate what populates on your Folder Report when you download it for a folder of this type.
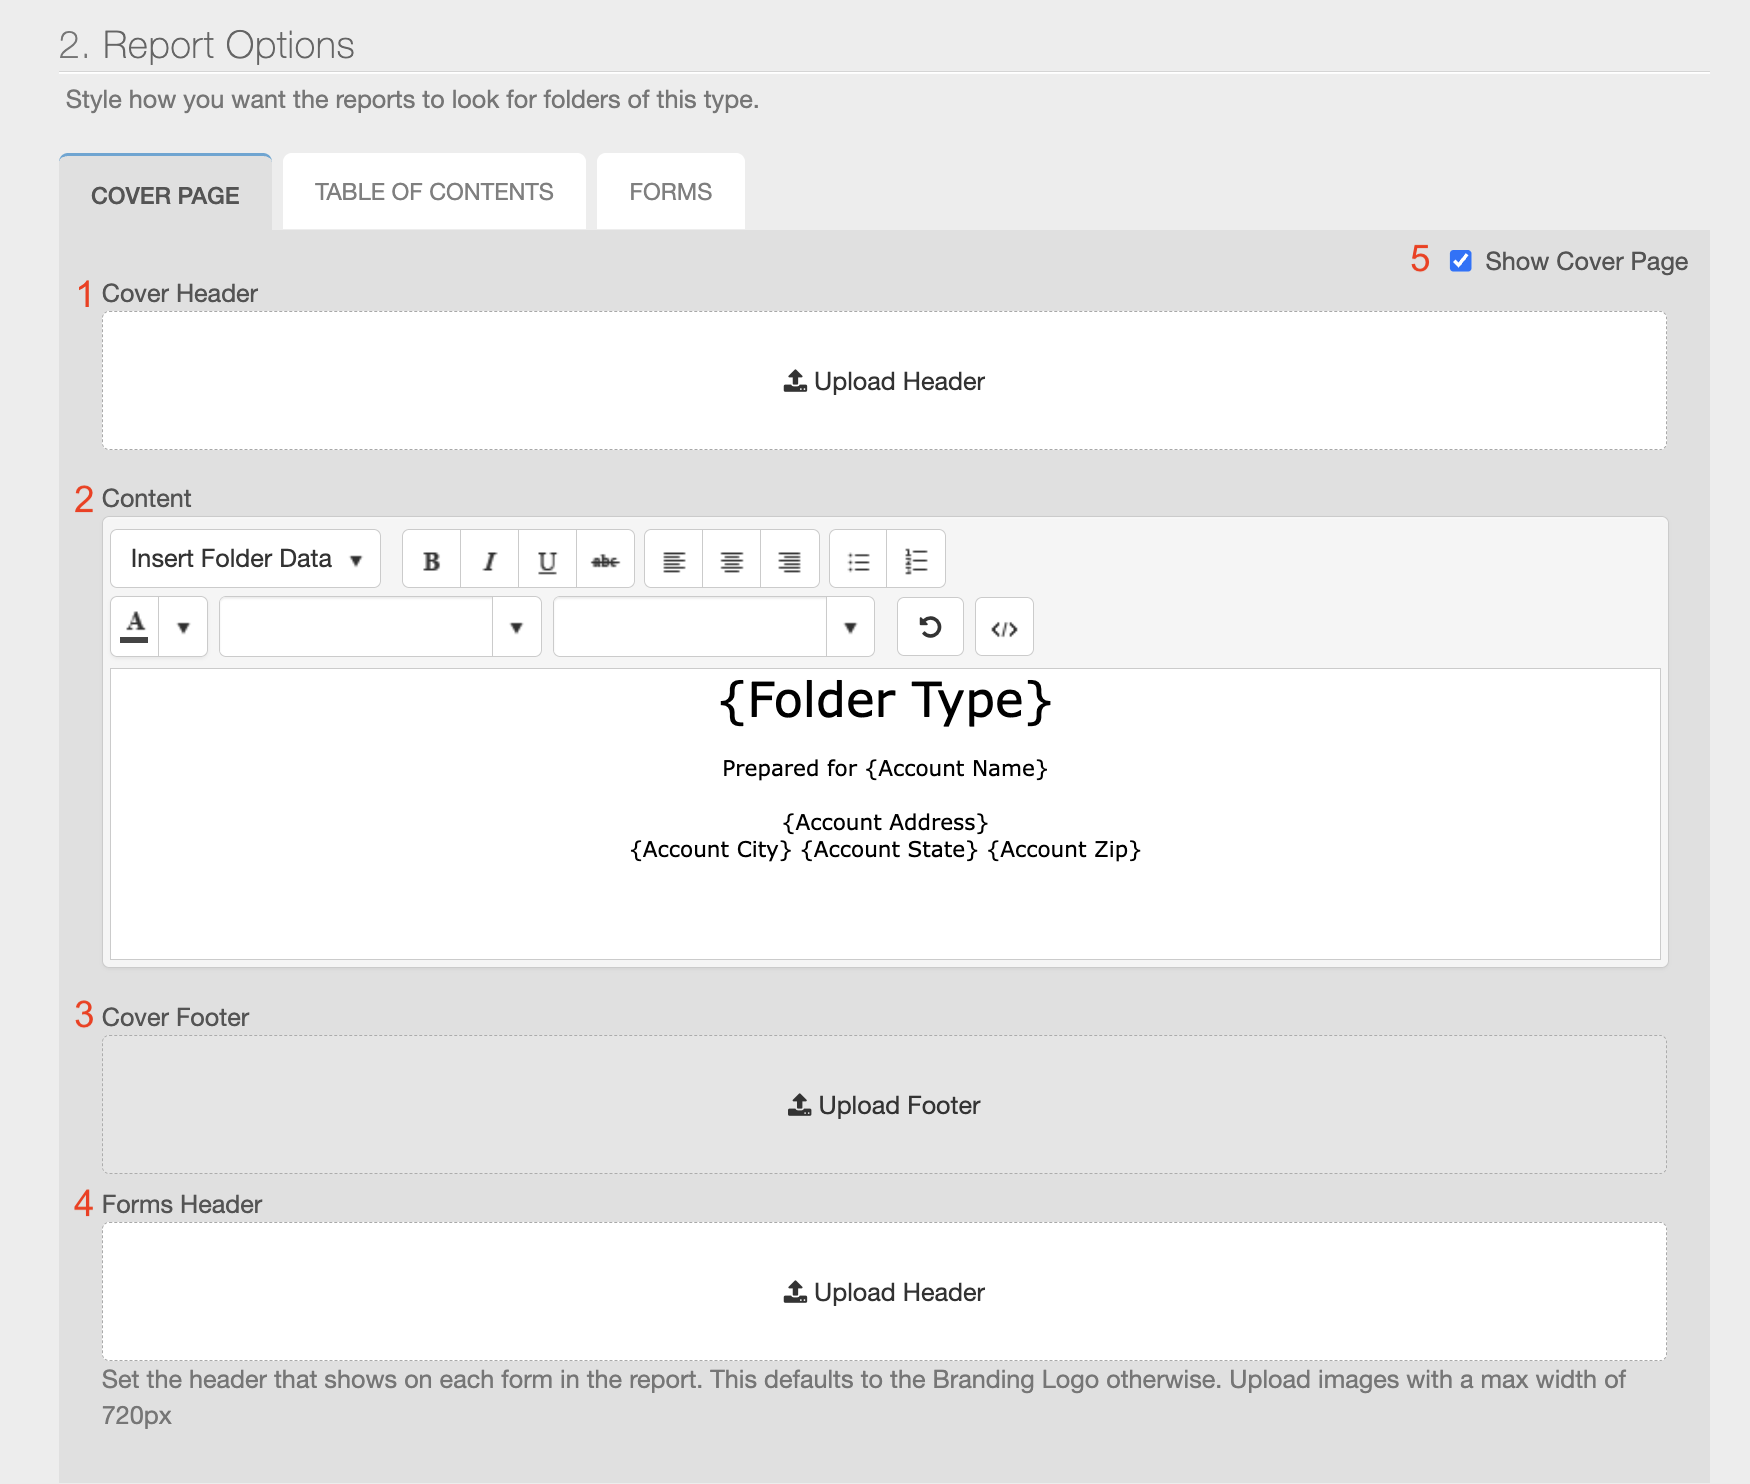
1. Cover Header: This section is where you will upload your coversheet logo image file.
- Click "Upload Header" to select a file containing a custom header image. If there is already an image in the Header Section, first delete the image by clicking on the red delete icon, then click on "upload header" to add a new image. File types supported are .jpg, .jpeg, .png, .gif, and .bmp. This logo can be different for each folder type, or you can use the same logo on all Folder Types. This image file should be larger to cover the width of a standard piece of paper. Think about 7.5-8" (about 720 pixels). The cover page logo will automatically left align.
- Content:
- Use the Tool Bar in the content section to update font styles, or add information to be automatically pulled from the Folder details.
- Click "Insert Folder Data" to add information fields to your cover page.
- You can insert any information from the drop down list that will automatically populate on the cover sheet of your report. This information will show up in brackets on the cover sheet content section in Folder Settings. { } Any text outside of the brackets will be static.
- For Dates, you can insert the Date Created or Date Closed (which will be based on when the folder was created or closed). Or if you want the cover sheet to show the date the report was printed, enter "@Month/@Day/@Year". Completed dates will show up on FORMS automatically. More details on folder report date options can be found HERE.
- "Folder Type" will pull the Name of the Folder Type into your report. So, for instance, if you are doing an Annual Inspection Folder type, that is the information that will show up where you insert the Folder Type data.
- If you want to be able to manually add information on the cover sheet, use the "Description" field. The description field pulls any information you enter in the Folder Description on a folder (from the website or mobile app).
- Edit font style, alignment, and size.
- Click on the text box to edit the fields.
- Cover Footer: This section is where you will upload your coversheet logo image file that will show up at the bottom of the cover sheet page.
- Click "Upload Footer" to select a file containing a custom header image. If there is already an image in the Footer Section, first delete the image by clicking on the red delete icon, then click on "upload footer" to add a new image.
- Forms Header: If you add a logo image here, it will override the report branding image set up for your account for this folder type. This logo should be a small file, and will show up on the pages after the cover sheet at the top in the Header section. You'll want it to be maybe 2-4" wide (about 300 pixels) and about 1-2" tall (about 80 pixels). More details on Alternate Branding can be found HERE.
- Show Cover Page: uncheck this box if you want to omit the cover page for folder reports for this folder type.